Điều khiển Servo thông qua NodeMCU ESP8266 và Blynk hiển thị lên OLED 0.96

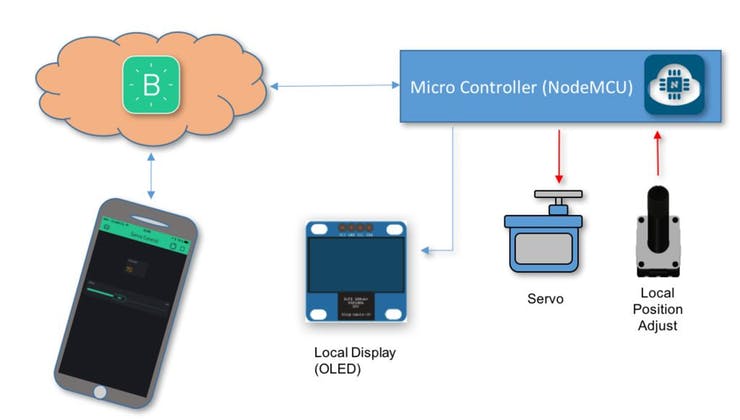
Trong nội dung bài viết hôm nay mình sẽ hướng dẫn các bạn cách làm thể nào để điều khiển Servo thông qua NodeMCU ESP8266 và App Blynk hiển thị lên OLED 0.96. Để có thể hiểu rõ hơn về bài viết hôm nay các bạn xem lại bài viết bên dưới nhé.
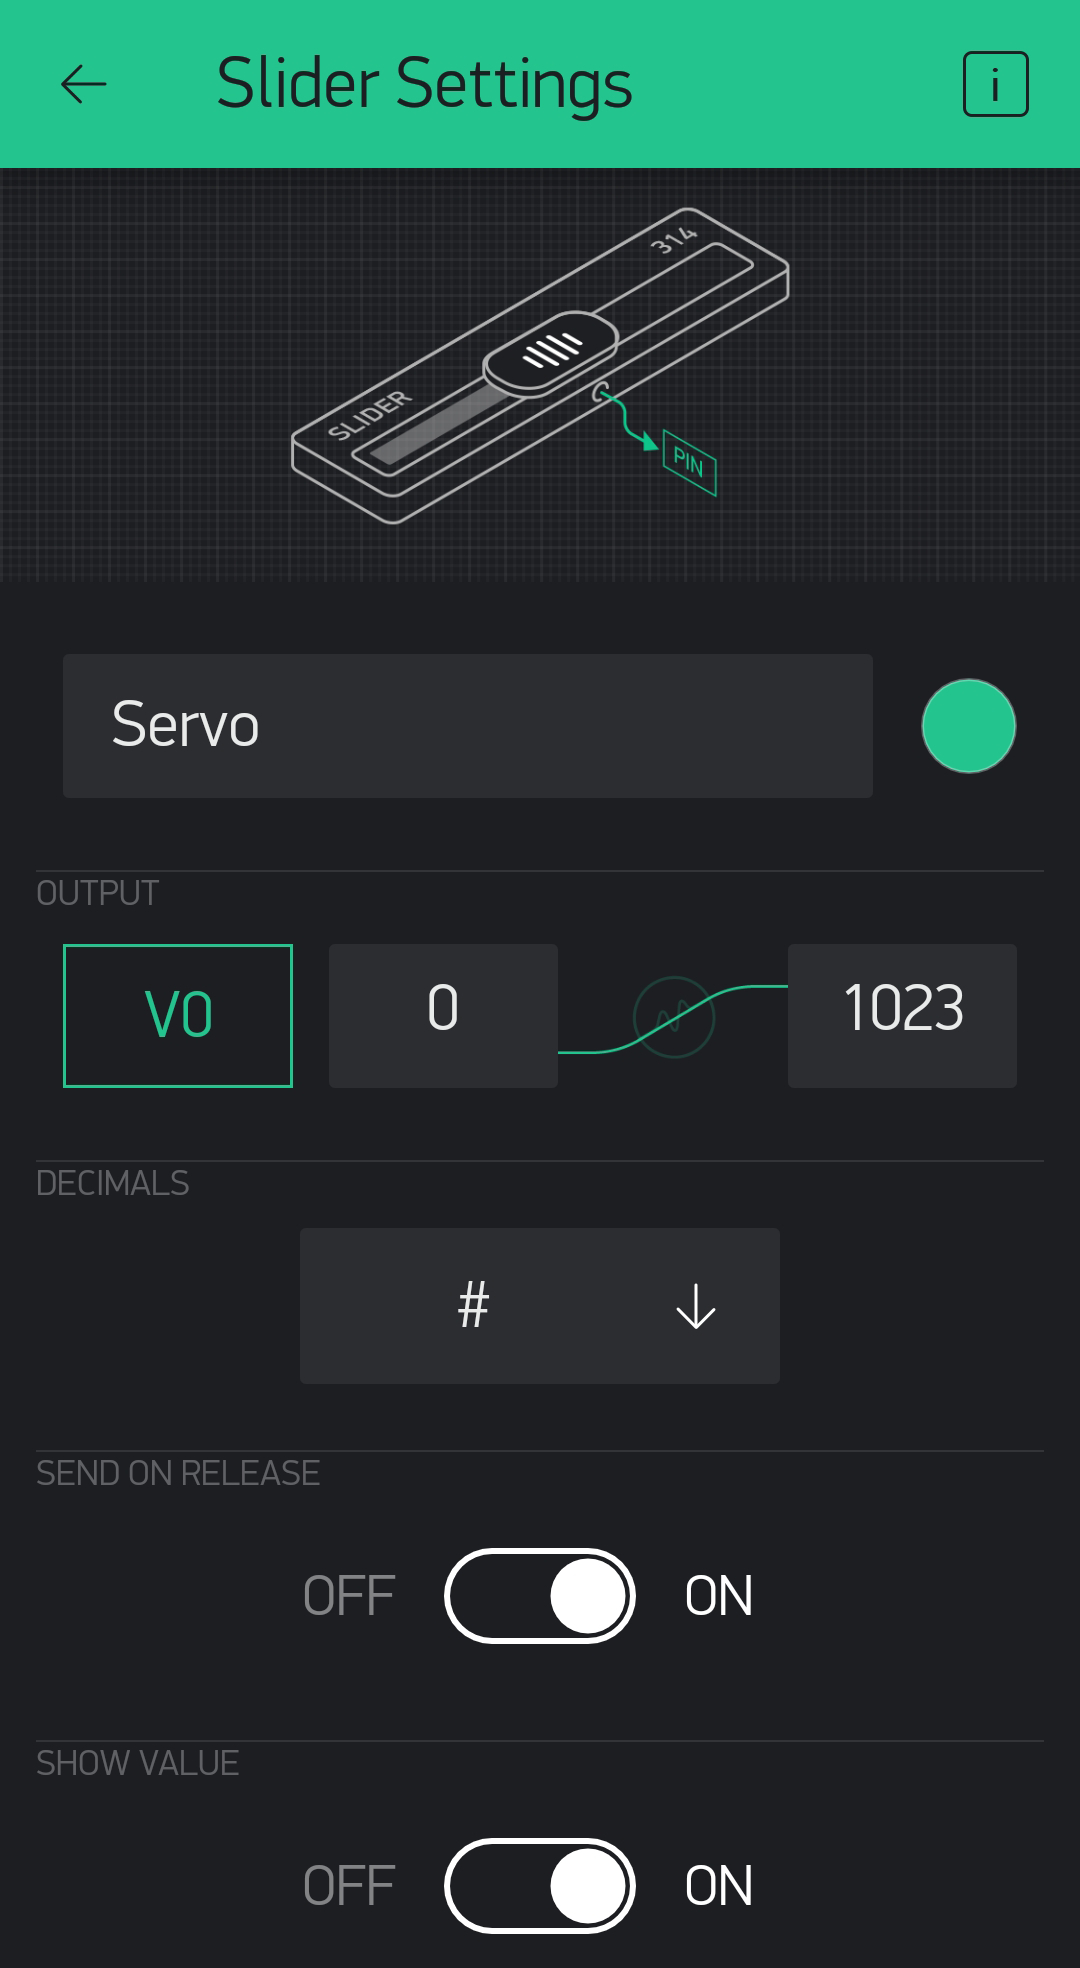
Cấu hình thông số Servo trên App Blynk
Chọn thẻ Slider
- OUTPUT: VO (0 ~ 1023)
- DECIMALS: #
- SEND ON RELEASE & SHOW VALUE: ON
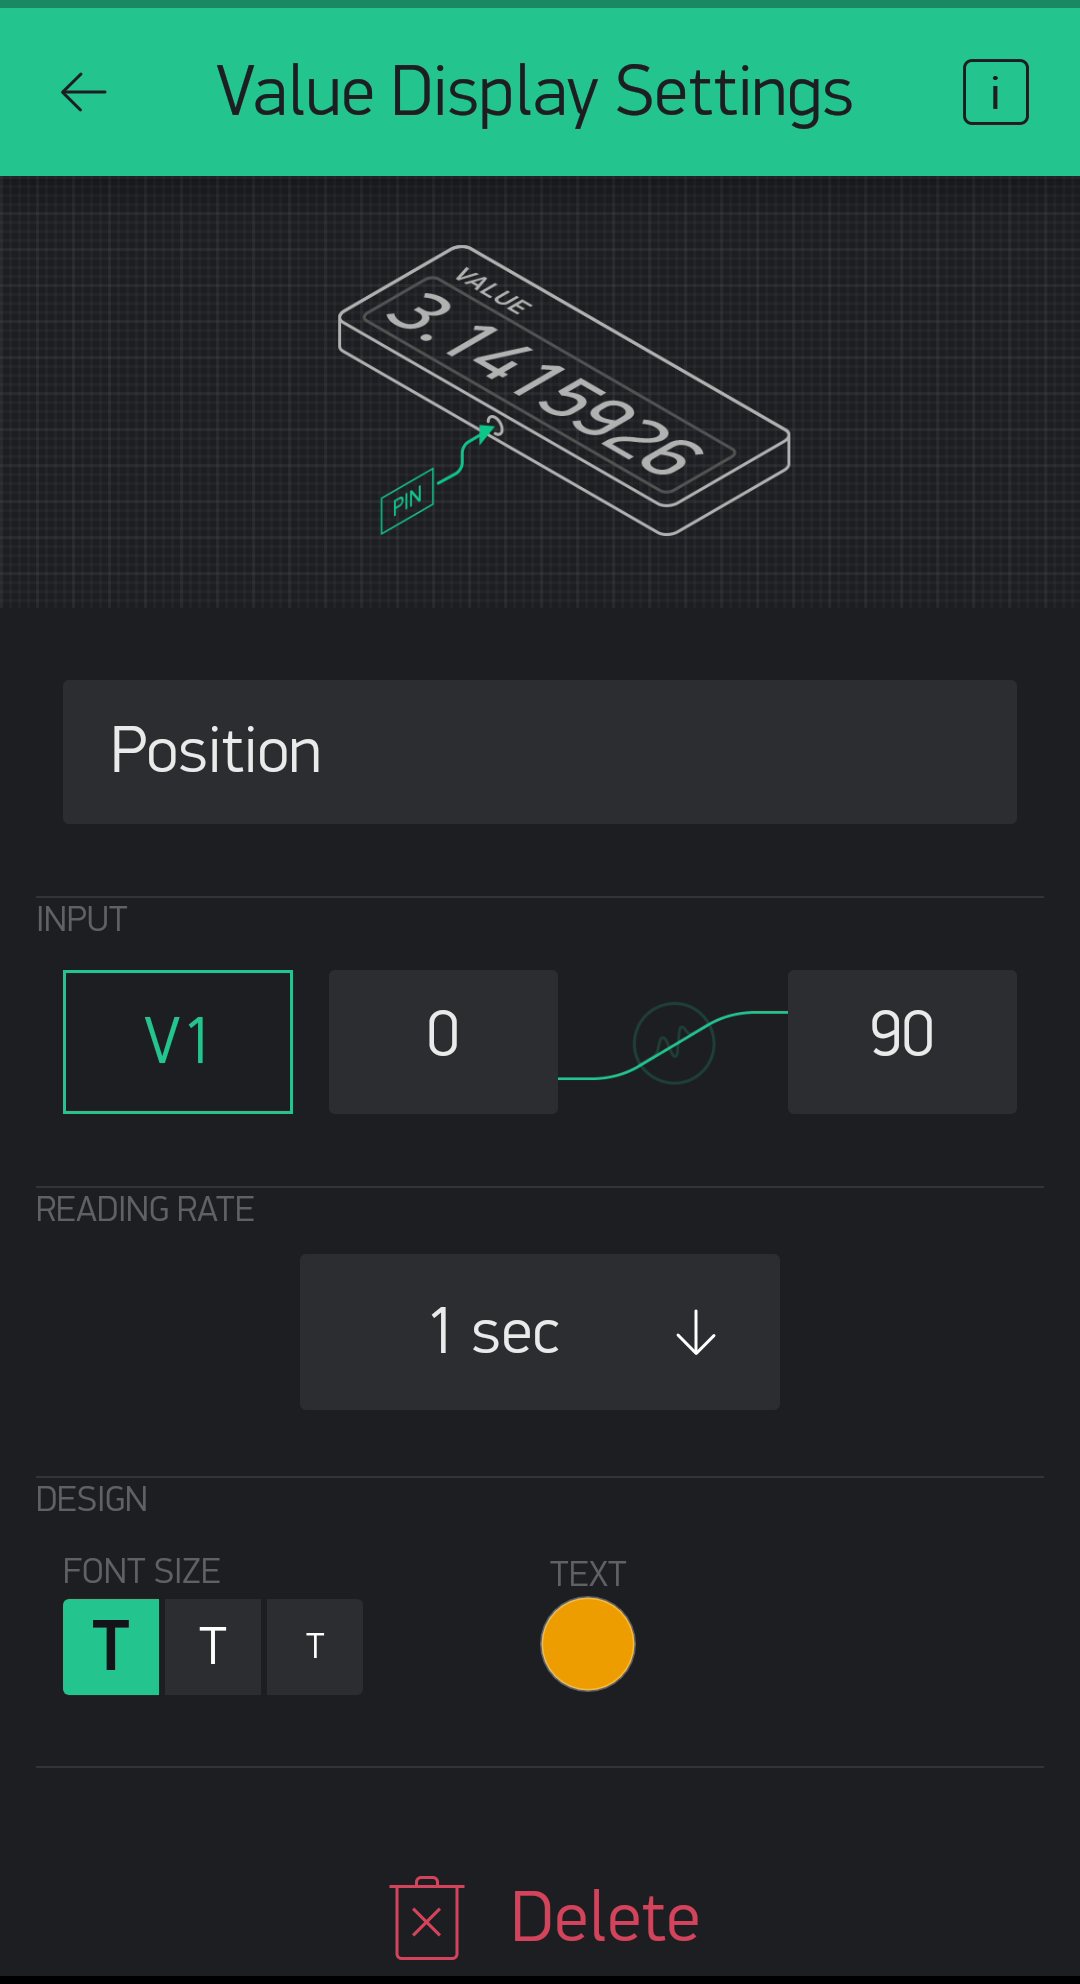
Chọn thẻ Value
- INPUT: V1 (0 ~ 90)
- READING RATE: 1 sec
Sơ đồ nguyên lý

Các linh kiện cần thiết cho dự án
| Tên linh kiện | Số lượng | Shopee |
| NodeMCU ESP8266 | 1 | Mua ngay |
| Dây cắm (Đực – Đực) | 1 | Mua ngay |
| Dây cắm (Đực – Cái) | 1 | Mua ngay |
| OLED 0.96 | 1 | Mua ngay |
| Servo SG90 | 1 | Mua ngay |
| Biến trở 100k | 1 | Mua ngay |
| Breadboard | 1 | Mua ngay |
| Board nguồn (3.3V – 5V) | 1 | Mua ngay |
Code
#define SW_VERSION "ServoCtrlBlynk_V.1"

/*NodeMCU */
#include <ESP8266WiFi.h>
char ssid [] = "Phamson";
char pass [] = "phamtheson";

/* Blynk */
#include <BlynkSimpleEsp8266.h>
#define BLYNK_PRINT Serial    // Comment this out to disable prints and save space
char auth [] = "6zCB6XaSV9PflOIBv7h1uOF7pgUV99t9"; // Servo Control Project // Servo Control Project

/* OLED */
#include "SSD1306Wire.h"
#include "Wire.h"
const int I2C_DISPLAY_ADDRESS = 0x3c;
const int SDA_PIN = 0;
const int SCL_PIN = 2;
SSD1306Wire display(I2C_DISPLAY_ADDRESS, SDA_PIN, SCL_PIN);

/* Servo */
#define servo1Pin D2
#include <Servo.h>
Servo servo1;

/* Initial pot reading and servo position set the position to neutral */
#define potPin A0
int potReading = 1023/2;
int servo1Angle = 90;

/* Reads slider in the Blynk app and writes the value to "potReading" variable */
BLYNK_WRITE(V0)
{
  potReading = param.asInt();
}

/* Display servo position on Blynk app */
BLYNK_READ(V1)
{
  Blynk.virtualWrite(V1, servo1Angle);
}

void setup ()
{
  Serial.begin(115200);
  servo1.attach(servo1Pin);
  displaySetup();
  Blynk.begin(auth, ssid, pass);
}

void loop()
{
  Blynk.run();
  //PotReading = analogRead(potPin);               // Read Analog data from potenciometer not used here
  servo1Angle = map(potReading, 0, 1023, 0, 180);  // Map the pot reading to an angle from 0 to 180
  servo1.write(servo1Angle);                       // Move the servo to a position
  displayAngle();
  delay (200);
}

/* Initiate and display setup data on OLED */
void displaySetup()
{
  display.init();         // initialize display
  display.clear();        // Clear display
  display.display();      // Put data on display
}

/*  Display Servo position */
void displayAngle()
{
  display.clear();
  display.setFont(ArialMT_Plain_16);
  display.drawString(10, 0, "Servo Control");
  display.drawString(0, 45, "POSITION:" );
  display.setFont(ArialMT_Plain_24);
  display.drawString(80, 40, String(servo1Angle));
  display.display();
}
Giải thích code
Khai báo Tài khoản và Mật khẩu Wifi.
char ssid [] = "Phamson";
char pass [] = "phamtheson";
Mã Token được cấp khi tạo mới Project trên Blynk.
char auth [] = "6zCB6XaSV9PflOIBv7h1uOF7pgUV99t9";
Đọc giá trị thanh trượt trên App Blynk và ghi giá trị vào biến “potReading”.
BLYNK_WRITE(V0)
{
  potReading = param.asInt();
}
Hiển thị giá trị Servo trên App Blynk.
BLYNK_READ(V1)
{
  Blynk.virtualWrite(V1, servo1Angle);
}
Thư viện
Bài viết liên quan
- Hướng dẫn cài đặt ESP8266 và kết nối với Blynk
- LED RGB sử dụng NodeMCU ESP8266 thay đổi màu sắc trên App Blynk
- Giám sát nhiệt độ, độ ẩm bằng App Blynk sử dụng NodeMCU ESP8266
- Cảnh báo trộm bằng cảm biến PIR (HC-SR501) thông qua App Blynk sử dụng ESP8266
- Xác định khoảng cách khi đỗ xe bằng cảm biến HC-SRF04 sử dụng ESP8266 và App Blynk
- Điều khiển động cơ Servo SG90 bằng App Blynk sử dụng NodeMCU ESP8266